Configure Mac OS as a Jenkins node on Mac Mini
In this article, I’ll show you how to configure Mac OS as a Jenkins node on a Mac Mini.
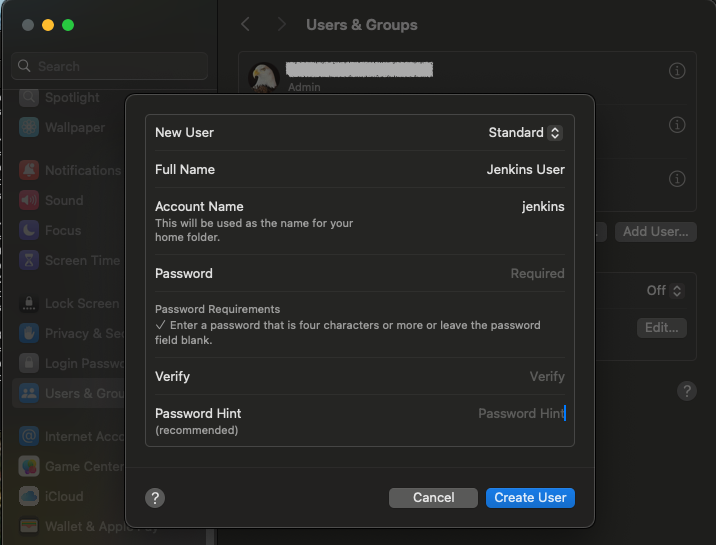
Create jenkins user
First, create a new user called jenkins on your Mac Mini. This user will be used to run the Jenkins agent.
sudo dscl . -create /Users/jenkins
sudo dscl . -create /Users/jenkins UserShell /bin/bash
sudo dscl . -create /Users/jenkins RealName "Jenkins User"
sudo dscl . -create /Users/jenkins UniqueID 1001
sudo dscl . -create /Users/jenkins PrimaryGroupID 1001
sudo dscl . -create /Users/jenkins NFSHomeDirectory /Users/jenkins
sudo dscl . -passwd /Users/jenkins
Create home directories for local home paths only.
sudo createhomedir -u jenkins -c > /dev/null
Enable Remote Login
Enable the service: sudo systemsetup -setremotelogin on
See the current remote login status: sudo systemsetup -getremotelogin
Disable remote login: sudo systemsetup -setremotelogin off
Add jenkins user to the Remote Login group
Add user to the Remote Login group using the following command, or via System Settings > General > Sharing > Remote Login.
sudo dseditgroup -o edit -a jenkins -t user com.apple.access_ssh
Connect as jenkins user
Login as jenkins user on local machine.
sshpass -p THE_PWD ssh jenkins@HOST-NAME
If sshpass is not installed, you can install it using Homebrew.
# Search for the sshpass using the brew command on your Mac
brew search sshpass
# Display package information
brew info sshpass
# install the sshpass on your macOS
brew install sshpass
Install Homebrew
cd $HOME
git clone https://github.com/Homebrew/brew.git
./brew/bin/brew tap homebrew/core


export PATH=$HOME/brew/bin:$PATH >> ~/.zshrc # or ~/.bash_profile, ~/.bashrc, etc.

source ~/.zshrc  # or ~/.bash_profile, ~/.bashrc, etc.

which brew # see that brew is found in your path
Install JEnv
brew install jenv

# Setup JEnv to install run
export PATH="$HOME/.jenv/bin:$PATH"
eval "$(jenv init -)"
# To ensure that JAVA_HOME is correctly set
jenv enable-plugin export
# Instruct Maven about used Java version
jenv enable-plugin maven
Source the file to apply the changes
source ~/.zshrc # or ~/.bash_profile, ~/.bashrc, etc.
Check the jenv health
jenv doctor
Install Java
Install Java 17
brew install openjdk@17
Add Java Versions to jenv
jenv add /Users/jenkins/brew/opt/openjdk@17
Set/unset global version of Java. The global version will be the default for your system.
jenv global 17.0.13
jenv global --unset
Set/unset local version of Java. This will add a .java-version file in the directory you’re currently in so you can commit it as a part of your Java project.
jenv local 21.0.2
jenv local --unset
List the installed versions of Java
$ jenv versions
  system
  11
  11.0
  11.0.25
* 17 (set by /Users/jenkins/.jenv/version)
  17.0
  17.0.13
  openjdk64-11.0.25
  openjdk64-17.0.13
Show the current installed version of Java
mac-mini:~ jenkins$ jenv version
17 (set by /Users/jenkins/.jenv/version)
Verify the Java Version
mac-mini:~ jenkins$ java -version
openjdk version "17.0.13" 2024-10-15
OpenJDK Runtime Environment Homebrew (build 17.0.13+0)
OpenJDK 64-Bit Server VM Homebrew (build 17.0.13+0, mixed mode, sharing)
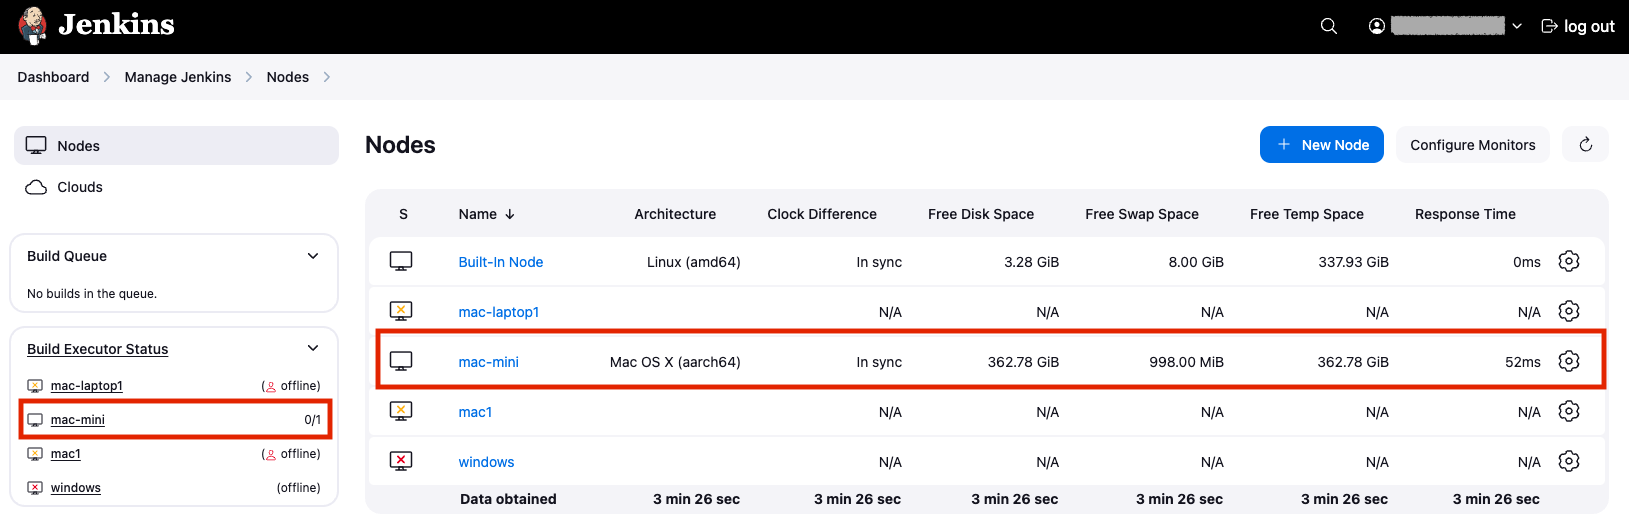
Configure Jenkins Node
Go to Jenkins -> Manage Jenkins -> Manage Nodes and Clouds -> New Node -> Enter the node name and select Permanent Agent -> Enter the node description -> Click OK.
Configure Auto Restart after Power Failure
Settings ->Energy Saver->Start up automatically after a power loss or you can do it with the terminal:
sudo systemsetup -setrestartpowerfailure on
sudo systemsetup -setWaitForStartupAfterPowerFailure <number of seconds to wait>